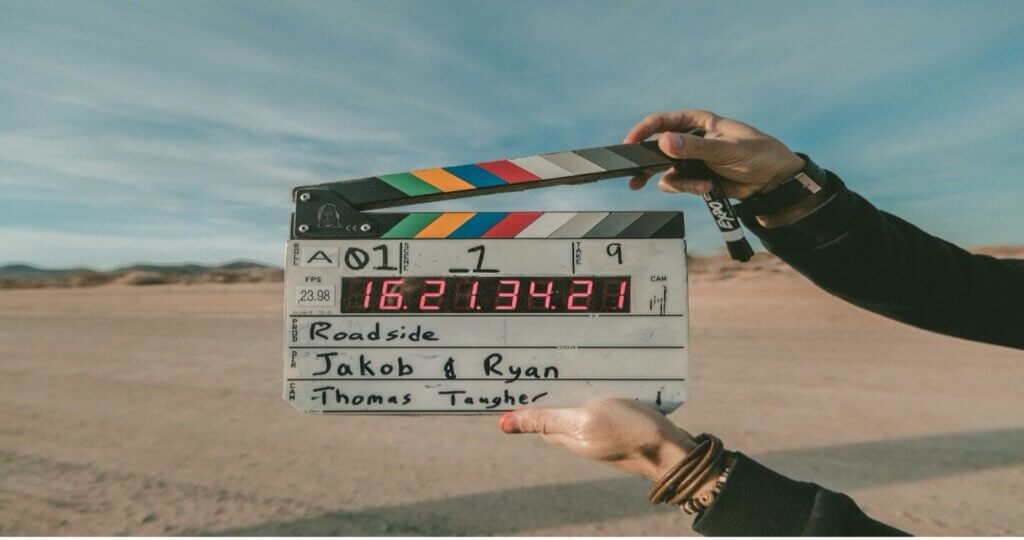
People tend to connect with stories they can see, stories that engage them and make a topic seem real and personal. Telling your story through video can be a very powerful tool for attracting funders, raising public awareness, growing your community, and much more. And the best part is that you can make a video to tell your story even with limited resources and budget. This recipe covers the creation of a video from idea to distribution using just an Android phone and software tools that can be used for free. But before you get started here are some general tips to keep in mind.
- Don’t be afraid to get creative
- Create stories that have a beginning, middle, and an end
- Show, don’t tell
- Don’t run with the first thing that comes to you
- Tell one story at a time
- Keep things short and snappy
Pre-production (planning and organizing)
Step 1. Get participants
You may be tempted to come up with a story first and then decide who to film. This runs the risk of coming up with a great story, only to realize you have no one to tell it.
Who
When deciding who to include in your film, you will want to take into account who has the most passion for your topic and the most compelling story to tell. You’ll also want to pay attention to how they come across on camera. People with expressive faces, who are animated when they speak, are authentic and articulate will be more engaging for your audience to watch than someone who is more timid or stoic. You also want to choose people who are trustworthy. Will they show up to your scheduled shoots and will they tell the truth when you interview them? Working with people who are unreliable will add additional, stress to your project and can also cause costly delays.
How
Once you have decided on who you want to include you’ll need to determine how they will be included. Will you be interviewing them? Will you be following them around as they go about their daily activities? How many times will you need to interact with them? All of these logistics will play into how you scheduled your shoots as well as if and how you will compensate those appearing in your film.
Make it official
Make sure you have everyone appearing in your film sign a consent form agreeing to be on film and that they are okay with you distributing the film. It’s important to have written consent to avoid any potential confusion down the line.
Once you have determined who will be in your film, how they will be in your film, if they will receive compensation, and obtained written consent you are ready for the fun part. Bringing your vision to life!
Step 2. Determine your plot
When determining the plot for your film, you’ll need to determine what purpose your film serves. What is your thematic statement, meaning what message are you trying to get across? Keep in mind that in documentaries you will not write a traditional script so it’s important that you are very clear on the purpose of your film and the message you are conveying. Additionally, you’ll want to know exactly what the aspects of your subject are that beg to be explored and which elements of the subject the audience will care the most about and find compelling. This will help you get the footage you need in order to tell a cohesive and meaningful story that will engage and motivate audiences. Speaking of footage, figure out in advance if there is existing footage or photos you can use or if you will be shooting all brand new film.
Step 3. Map your vision
Your story structure will help you conceptualize the story you wish to tell using the main characters and key story points – the main character’s goal and your thematic statement (the issue that underlies your film and drives its purpose). It will guide you in what footage to shoot, who to interview outside of your main character/characters, and the questions you plan to ask. Don’t get too caught up in the details when thinking through the structure; “guide” is the key word. You won’t necessarily know the entire story until after you’ve done the filming. It’s perfectly okay and sometimes even better if the story you end up with is different than the story you planned on telling. As you start out, here are things to think about when creating a story structure for your film:
The setup:
Establish the protagonist of your film and their world. You’ll need to establish your protagonist’s back story and the problem they are confronting.
The journey:
Once you’ve introduced the audience to the main character and their plight it’s time for the “journey”. In other words, the protagonist’s quest to achieve the goal and solve the problem that you introduced in the setup. This will be the meat of your film. Show people what the protagonist has already done. What are they up against? Why isn’t this challenge easy to overcome? Why does it need to be overcome? You’ll want to highlight the stakes and detail what will happen if the protagonist fails to achieve their goal. The higher the stakes, the more compelling your story will be to an audience.
*Note that you don’t have to follow your protagonist on an actual journey. Your film might focus on a problem the main character already tried to tackle. If that’s the case you’ll probably rely heavily on archival footage and interviews instead of real-time footage.
Climax and conclusion:
The climax should come at the mid-point of your film and will ideally showcase a scene when the stakes are at their highest, perhaps with an acute risk of the protagonist failing – perhaps after a major setback in achieving the goal. The rest of the film will then focus on how the protagonist deals with this setback and its outcome. Did the protagonist meet their goal? What difference did meeting their goal have on them/their world? If they didn’t meet their goal then what now? You want people to understand the magnitude of the problem, and the severity of the consequences if the problem isn’t dealt with, but you do not want them to feel like the situation is hopeless or that it’s a lost cause, especially if the protagonist doesn’t achieve their goal by the end of your film. Hope and the belief that an individual’s actions can make a difference are powerful motivators for an audience. Regardless of whether the goal was met, you will want to show what the protagonist learned from the experience. How things have improved since the journey to solve the problem was started. What still needs to be done, and how interested parties can learn more, get involved, or support the work (sometimes termed the “call to action” – what you are asking of your audience).
Step 4. Make your plan
As mentioned previously, documentary films won’t have a traditional script. But you still want to have an idea of how you would like the story to be organized and played out. A simple way to do this is to create a two-column script.
A two-column script (sometimes called a split script) is a visual representation of what is expected to happen in the film depicted in two columns. The left column is used to describe the imagery that the viewer will see in each shot/scene and the right side will describe the audio that will accompany the video in the shot/scene. Like the story structure, this is meant to be a guide so it doesn’t need to be detailed shot by shot and may change as you film depending on where the story goes and the footage you capture.
Create a two-column script with Microsoft Word
- Create a table with 2 columns

- Then add the visual cues to the left column of the table and the audio cues to the right column.

- Insert rows below to build out your table and add more visual and audio cues as needed.
Two-Column script examples
- Two-column script example
- Two-column script example 2
Two-column script tutorials
Two-column script template, example, and walkthrough
Creating a two-column script (video; 15 min)
Scene scoping for higher budget films
If you are making a higher-budget film with intricate scenes and advanced post-production plans then you may need to create something more complex than a simple split script called a shot list. With a shot list instead of two columns you will set up a table. The table will have columns with any or all of the following headers depending on your needs:
- Scene
- Setup
- Shot
- Description
- Equipment
- Movement
- Angle
- Shot size
- Audio
- Lens
- Time estimate
- Camera
- Cast
- Best take
- Timecode
- Notes
Breaking down the shot list
- Scene: Indicate the scene number.
- Setup: Add a new setup every time you reposition the camera or change the lighting. You can use these setups later to group similar setups together, making it simpler to shoot.
- Shot: Increase the shot number by one every time you start a new shot. Depending on your preference, you may want to reset the shot number for every new scene you shoot, but it is also okay to continue increasing by one from the last shot in the previous scene.
- Description: Use this column to quickly explain the relevance to the story structure. You should say what the focus of the scene is – whether it’s an actor, group of actors, prop, or a setting. Then describe any action that’s happening, any props involved, and what exactly the camera should capture. This description lets the director know everything that’s happening in the shot and helps ensure that everyone is on the same page.
- Equipment: Use this column to list the equipment that will be supporting the camera. Note if you will be using a tripod, Steadicam, wagon, etc.
- Movement: Use this column to explain any camera motion. For example: static, pan left to right while zooming in on subject, tilt, etc.
- Angle: Use this column to describe the angle of the camera in relation to the subject of the scene. If your camera’s lower than your subject, it’s a low angle. If it’s higher than the subject, it’s a high angle. You can also include other terms that help to explain the angle, for example: eye-level.
- Shot size: Describe the size of your subject in the frame. Varying shot sizes and having them appear in different orders creates dramatically different effects and creates visual interest for the viewer. A scene might start with a wide shot to establish where it’s happening, before moving to a mid-shot of your subject, then a close-up of the action. Shot sizes are often abbreviated. For example: wide shot (ws), very wide shot (vws), mid-shot (ms), close-up (cu), etc.
- Audio: Use this column to describe the audio source. Are you using an external mic, will there be a voiceover, etc.
- Lens: Use this column to record which size lens you’re using. For example: 24mm, 50mm, 200mm, etc. Note that when filming with a smartphone you will only need to include this column if you are using your phone in conjunction with an external lens.
- Time estimate: Use this column to estimate how long it will take to set up (not shoot) each shot. This will help you build your schedule and timings for each day. It’ll also highlight any time-consuming shots, in case you need to cut or change them during the day.
- Camera: Use this column to remember which camera/device you’re using (if you’re using more than one).
- Cast: Use this column to note down which characters are in the shot.
- Best take: Using this column and the following Timecode column can make editing easier. In this column record if you got a particularly great take for a scene and when it happened. If you don’t have a timecode, just change that column from ‘timecode’ to ‘clip’.
- Timecode: In this column indicate the timecode of the great take. If you don’t have a timecode change the heading to “clip” and indicate which clip the take happened in.
Shot list examples and tutorials
Production (equipment and shooting)
Shooting is probably the most important stage of the video-creating process. If the material you capture is low quality no amount of post-production will be able to fix it for you. Sure there are tools that can help enhance poorly captured video, but to get professional quality footage there is no substitute for well shot film. In this section, we will review tips, tricks, and tools for making sure you are shooting the highest quality video possible with your device.
Filming
Many phones are now capable of filming in very high resolution, like “4K”, “UHD” or “Ultra HD”, but don’t worry if the phone you have, or the phone in your price range only supports high definition (“HD” or “1080p”). Since many TVs and monitors aren’t yet compatible with 4K, being able to shoot in 4K is more of a nice to have than a necessity. As long as your device can capture high definition video, you should be able to get good quality footage.
When filming you may be tempted to purchase a third-party video-recording app rather than using the camera app that came bundled with your Android device. While third-party apps may have features like image stabilization, your device’s native camera app will almost always be sufficient to meet your needs.
As you start filming there are style choices that can detract from the quality of your footage. Zooming can greatly reduce the quality of the footage you shoot. Few if any Android phones have quality digital zooms, so using it will diminish the appearance of your film. If you need to get an up close shot of something, you are better off slowly moving in on foot (keeping both hands on the camera and your elbows as close to your waist as possible). Another strategy for mimicking the look of a zoom is to find something with wheels: a wagon, trolly, scooter etc. Either sit on the wheeling object or attach your tripod to it and slowly push it (or have someone push it with you in it) towards the subject you wish to zoom in on. If the subject is far away, you can add cross-fades and transitions in the editing process to minimize the amount of time the viewer has to watch the zoom process. If you have the budget, you may want to consider purchasing a clip-on macro lens that will allow you to use its zoom feature with your phone.
Panning (moving the camera from side to side) is another filming technique to use cautiously. Stylistically, there is nothing wrong with the occasional pan and it can add interesting juxtaposition to your scenes, however, it is difficult to pan smoothly so you want to use it strategically and sparingly. When you do pan, keep both hands on the camera and elbows in and turn your body at the waist instead of moving your arms. This will help keep the shot as steady as possible.
Lighting
When lighting a location or subject, there are many different types of lighting to think about. The two most important are key lighting and fill lighting. Key lighting is your main source of light. It is most likely the strongest and brightest light in your shot regardless of whether it’s the sun or artificial light. Your main light doesn’t always have to be directly pointing at your subject, but make sure it’s not too close to your camera or the lighting will be flat and unflattering.
Fill lighting is used to remove the shadows that your key light creates. This allows the viewer to see more of the scene than if only key lighting is used. Fill lighting is usually achieved with an external light, but can also be created by using a reflective surface angled toward your subject. A white foam board can be a great reflector for outdoor shots for example. Light colored walls and ceilings can be used as large reflectors when indoors and can create subtle lighting effects. Light colored fabric can also be used to reflect light
Another source of light that is important, but not essential is the backlight. This is a light source that is less bright than the key light and is placed behind your subject. With good key and fill lighting you can often get away with not using backlighting. However, backlighting provides a professional quality to shots by adding subtle shading.
Other types of lighting set ups include:
- Practical lighting – the use of everyday objects to light a scene, such as a candle or floor lamp. The downside to practical lighting is that these light sources aren’t usually bright enough to fully light the subject.
- Backlighting – lighting a subject from behind to create a silhouette
- Side lighting – external light placed on the side of the subjects (often parallel to the subject) can make your subjects seem further away by calling attention to the space between them.
- Bounce lighting – reflecting light from the light source towards your subject. This can be done with a mirror, reflector, or a light colored surface such as a white painted wall. Bounce lighting creates a bigger and more spread out area of light which is a good way to light up an entire shot.
If you have the budget, investing in quality lights is worth it. However, not having the budget doesn’t mean you have to have bad lighting. There are some simple steps you can take to dramatically improve the lighting of your footage:
- Never backlight your subject unless you are purposely trying to achieve a silhouette look
- Take advantage of natural light. Film outside or near large windows whenever possible. Make sure to position the subject or subjects you are filming so that the camera is nearest the window if you are indoors and capturing the light source shining on your subject(s). If you are outdoors then you want the camera to have its back to the light source (the sun) with the light shining directly on your subject. Use a simple reflector to add fill lighting.
- Try to film in brightly lit areas to avoid unnecessary shadows, but don’t point the camera directly at a bright light or the footage will be overexposed and most likely unusable.
Additional information:
- https://www.bhphotovideo.com/explora/video/tips-and-solutions/lighting-interviews
- https://guides.library.georgetown.edu/c.php?g=75854&p=491499
- http://www.magnumco.com/the-ultimate-guide-to-film-lights/
- https://nofilmschool.com/film-lighting-techniques-and-examples
- https://www.premiumbeat.com/blog/basic-light-placements/ (incl. video segments)
Stabilization
A tripod will always be better than filming free hand, but if a tripod isn’t an option for you, there are some things you can do to minimize camera shaking. For starters, always hold the camera with both hands. No matter how steady you think your hand is, the camera will not agree. So always use both hands and keep your elbows as close to your body as possible, ideally resting on your waist and the phone as close to your body as well. This will give you tripod like support when filming. All this being said, an actual tripod really is the way to go, especially if you are filming interviews. The good news is that there are many decent tripods available that aren’t too expensive. If tripods are out of your budget and you are starting to experience arm fatigue from holding your device, you can always rest your phone on a physical support such as a table, flat rock, tree stump, chair, etc.
Types of stabilizers
- Tripods: 3-legged platform for camera attachment which can be unattended
- Selfie stick
- Mono pod: 1-legged platform which must be continuously balanced or supported by the operator
- Camera cages: a grip, mount, bracket, and/or housing for your camera that allows for better handheld use and provides multiple mounting points for video accessories
- Gimbals: a mechanical system to keep the camera rotationally stable (“level”) during motion
Audio
Although it is separate from video capture, bad audio can ruin a good video – making it just as important as shooting. If you will be using the live background sound you are recording with your video then there are things you need to do and be aware of. Most important is the location, especially if you won’t be using an external mic. Filming in areas with a lot of echo or wind (like tunnels) will destroy your sound quality. Similarly filming in nosy areas will drown out the sound you are trying to capture. A trick you can use if you do not have an external mic is to use your hand to shield your device’s internal mic (don’t cover it all the way). This will help reduce unwanted background noise. If you are interviewing someone, make sure you are as close to them as possible so that you can capture quality speech audio. If you have the budget for an external mic there are two different types to consider.
- Lavalier mic: small mic typically clipped to the clothing of the subject
- Condenser mic: high-quality mic typically placed on a stand or a pole in front of or above the subject
Alternatively, you can record audio with a different device and add it to the video in post-production

Post-production (editing options)
Editing
To make a cohesive film you will need to edit the footage you recorded into the cohesive story you mapped out in the planning phase. There are many ways you can do this. There are apps that allow you to edit film directly on your phone. There are editing programs that allow you to edit uploaded footage directly on your phone. There are online applications that allow you to edit footage in a web browser and there are programs that allow you to edit footage on your computer. The following are some options for each method.
Phone Apps
One of the most well-known editing apps for Android phones is called KineMaster. KineMaster offers a free, downloadable app that allows users to trim, enhance and combine video. It has a drag and drop interface so it’s easy to move video and photos from your phone’s media library, import them into the app and then move the footage around into different arrangements. With KineMaster a user is also able to add titles and transitions to the footage and record voice-over audio. A potential downside of KineMaster is that any video created with the free version will have the Kinemaster logo on it. Users of the KineMaster app will also need to watch ads periodically when using the free version. Purchasing the premium version removes KineMaster branding and ads. The premium version is $3.99 USD per month or $22.99 USD per year.
Browser/Online
If you wish to edit online in an internet browser, YouTube is one of the best-known options. Sign into or create a YouTube account, click on the “Upload” button at the upper right. Then in “Create Videos”, click on “Edit Videos” to go to the editing window. From there you will
- Click on the video editor button
- In select videos drag the clips that you want to use into the timeline
- Arrange and trim the video clips in the timeline
- Click on create video
- After a few minutes, you will be able to preview your video and decide if you wish to upload it.
Editing with YouTube does not allow you to add titles or transitions and the video will only be available through YouTube.
Tutorials
Video tutorials:
- How to update videos with the YouTube video editor -updated (18 minutes long)
- How to edit YouTube videos fast ( 28 minutes long)
Written walkthrough guides:
Computer
If you have access to a PC or a Mac then you have access to at least one video editing tool.
For Windows PCs
Windows: Your PC should come with the native Microsoft video editing tool called Windows Live Movie Maker. After you shoot your footage, send or share it with your Google Drive and then download the footage from Drive to your computer. You could also use a cable and connect your phone to the PC you’ll use for editing if you don’t have access to Google Drive. Once you’ve done that, you’ll open Movie Maker and drag the video file you downloaded into the Movie Maker timeline where you can start editing it.
Tutorials
- LEARN MOVIE MAKER IN 15 MINUTES! TUTORIAL FOR BEGINNERS (15 minutes)
- How To Use Windows Movie Maker In 2023 (20 minutes)
For Macs
Your Mac should come with the native Apple video editing tool called iMovie. After you shoot your footage, send or share it with your Google Drive and then download the footage from Drive to your computer. You could also use a cable and connect your phone to the Mac you’ll use for editing if you don’t have access to Google Drive. Once you’ve done that, you’ll open iMovie, create a new project and import the video file(s) you downloaded so you can start editing.
Tutorials
Video tutorials:
- iMovie 2020 (23 minutes)
- iMovie for Mac (22 minutes)
- How to use iMovie (18 minutes)
Other options
Shotcut – a free and open-source cross-platform video editor. Shotcut will work on Mac, Windows, and Linux operating systems. It has editing features, audio features, video effects and wide format support. A nice feature of Shotcut is that it provides several different tutorials on how to use it directly on their website.
Openshot – a free and open-source video editor that works on Mac, Windows, and Linux operating systems. Openshot allows users to trim and slice clips, add audio tracks, manipulate timing and video playback speed, and several other things. A neat feature of Openshot is that it is available in over 70 languages. To learn more, see the Openshot user guide which walks users through editing their first video. Below are additional video tutorials that you might find useful.
- OpenShot Video Editor – Tutorial for Beginners in 10 MINUTES! (10 minutes)
- OpenShot Video Editor Tutorial (35 minutes)
- How to Use Openshot Video Editor – Complete Tutorial (25 minutes)
- OpenShot Video Editor Tutorial – Designed for Beginners (30 minutes)
Lightworks – a computer program with a free version for users who only wish to post on YouTube or Vimeo. For other output formats, a user will need to purchase a paid subscription for either$10 USD per month or $24 USD per month. A features comparison chart can be found on their website that displays what is available for each subscription type.
Lightworks also provides a resource page with free editing tips, written guides, a video quick start guide as well as short tutorials on individual capabilities of Lightworks such as making freeze frames.

Distribution
Congratulations, you’ve done it! You came up with a concept, filmed your footage, captured audio, and edited it all together to produce what is surely a powerful film. So how do you share it with the world, or at least your intended audience?
YouTube
The most prominent and well known video sharing platform. There are about 2 billion people subscribed to YouTube. This can be both a pro and a con. On the plus side, it gives your video the chance to be seen by billions of viewers. The downside is it can be hard to find your video among billions of others. Successful YouTube content creators say that because of the vast array it’s very important to come up with the right keywords when naming and describing your video. Use both simple single word tags i.e. “farm” or “coffee” as well as specific terms for your audience such as “organic farming” or “regenerative agriculture”. For more information on how to increase the chances of your video being seen, Sherry Bonlli has an interesting article about YouTube SEO.
Posting to YouTube
- Log into YouTube Creator Studio.
- Click on the “Create” icon in the top-right corner and select “upload videos.”
- Select the file or files you want to upload.
- You will be asked to give the video a title, a description, a thumbnail, and other details.
- Click “Next.” In the next window, you can add subtitles, an end screen, and “cards” to promote related content in your video.
- Click “Next.” YouTube will scan your video for any potential copyright issues in the next window.
- In the final step, you can choose whether to make your video private, unlisted or public.
More detailed instructions are available in this written walkthrough
Other options
You are not limited just to YouTube for video distribution. You can post videos on your website, social media, and other video sharing platforms. You can also publish on a platform like YouTube and embed a player in your website (e.g. for WordPress). Some other options are listed below.
Vimeo
Vimeo is the go-to platform for creative professionals which means typically only the following types of videos tend to attract a large audience:
- Original short films
- Original animations
- Indie music videos
- Extreme outdoor sports/nature videos
Pros:
- No ads.
- Discreet, customizable video embeds.
- Create professional social media videos with Vimeo Create.
- Pro plans start at just $7 USD per month.
Cons:
- Low upload limits with free accounts.
- Narrow built-in audience.
Specs:
- Minimum resolution: 240p (426 x 240).
- Maximum resolution: 8K (8192 × 4320).
- Aspect ratio: 16:9 (automatically adds black frame for 4:3 videos).
- Max file size: 500 MB for free users (up to 256 GB for pro users).
- Max video length: restricted by file size.
- Total file storage: 500 MB/week for free users (20 GB/week for pro users).
- Accepted video formats: .MOV, .MPEG4, MP4, .AVI, .WMV, .FLV, .MKV, 3GPP, etc.
Vimeo is best for people who want to share creative projects with an engaged, but niche audience.
Daily Motion
Pros:
- Free unlimited video hosting.
- Option to make videos private and even password-protected.
- Some opportunities for audience building with less competition.
Cons:
- Smaller total audience than YouTube.
- Smaller max file sizes.
- Cannot download your videos without a third-party service such as the Daily Motion App
- Ads automatically play before, during, and after videos.
Specs:
- Minimum resolution: 240p (426 x 240).
- Maximum resolution: 4K (3840 x 2160).
- Aspect ratio: 16:9 (automatically adds black frame for 4:3 videos).
- Max file size: 2 GB.
- Max video length: 1 hour.
- Total file storage: Unlimited.
- Accepted video formats: .MOV, .MPEG4, MP4, .AVI, .WMV, .FLV, .MKV, 3GPP, etc.
Pros:
- Unlimited free video hosting
- Share videos directly on Facebook
- Build an audience on the largest social media platform
Cons:
- Ads automatically play on all videos.
- Very basic branded embedded player options.
- Lower video quality cap than other options.
Specs:
- Recommended resolutions: 720p (1280×720) or 1080p (1920×1080).
- Supported aspect ratios: landscape (16:9), portrait (9:16), vertical (2:3, 4:5), square (1:1).
- Max file size: 4 GB.
- Max video length: 2 hours.
- Total file storage: Unlimited.
- Accepted video formats: .MOV, .MPEG4, MP4, .AVI, .WMV, .FLV, .MKV, 3GPP, etc.